Monday, November 7, 2011
Tuesday, November 1, 2011
Step-by-Step Drawing
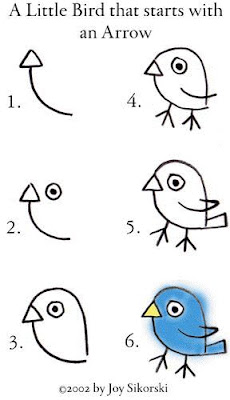
This site offers step-by step instructions on how to draw children loved characters and animals. A great way to begin practicing drawing skills. Check it out! DRAW & COLOR
Tuesday, October 25, 2011
Tuesday, October 18, 2011
Crazy Pumpkin Designs
We are going to paint paper plates using what we have learned about color. What two colors from the color wheel combine to make orange? Thats right! Yellow and red make orange. Students will paint paper plates and then use construction paper to design crazy pumpkins. The outcome should be a variety of unique pumpkin faces. Project inspired by adorable idea below:
Thursday, October 6, 2011
The Elements of Art
There are seven main elements of art:
Line
Shape
Form
Value
Texture
Space
& Color
We are going to learn about each of these elements and create a booklet displaying our new understanding. The Elements of Art should guide student thinking and open their minds to new ideas as art projects are completed both in and outside of class.
For more information view: WIKIPEDIA
Tuesday, October 4, 2011
Marbled Paper
Although it is a messy activity, we're going to try and make marbled paper in class. Here is my at home attempt and a LINK for step-by-step instructions.
Monday, October 3, 2011
Leaf Rubbings
We're going to explore leaf rubbings to learn about texture and play with color. I am excited to gather leaves with my students and do a variety of types of rubbings. Below are some fun examples and a LINK for step-by-step directions.
Wednesday, September 21, 2011
Line-Design
After teaching students about the color wheel, I want to try this line-design project. Students can explore different color combinations in their design. Directions for the project can be found at the link below. Pretty cool huh?
Tuesday, September 20, 2011
The Color Wheel
Primary Colors
The primary colors are the foundation of the color wheel. They cannot be created, no matter how many different color combinations you try. They are red, blue, and yellow.
Secondary Colors
Secondary colors are those you get when mixing two of the primary colors. Red and yellow make orange. Yellow and blue make green. Blue and red make purple.
Complimentary Colors
Complimentary colors are those opposite one another on the color wheel. Red & Green, Purple & Yellow, and Blue & Orange are all complimentary color combinations that "compliment" one another.
Warm Vs. Cool Colors
The basic warm colors are red, yellow, and orange. The basic cool colors are blue, purple and green. Neutral colors are black, brown, white, and grey. HERE you will find a video tutorial for a cool project to explore these color combinations.
Monday, September 19, 2011
Blobber!
When glue and Borax are mixed, a chemical change takes place. Blobber, a silly putty type substance, is formed. In class we will create Blobber using the recipe below:
Additional Information:
Thursday, September 15, 2011
Physical & Chemical Changes
Changes are all around us. A chemical change produces something new. A physical change does not produce something new.
Examples:
Use the following links to learn more:
Lesson:
Physical Vs. Chemical Games:
Rock-Paper-Scissors
Super Soccer
Want to be a Billionaire?
Quiz:
Quiz your knowledge
Examples:
Use the following links to learn more:
Lesson:
Physical Vs. Chemical Games:
Rock-Paper-Scissors
Super Soccer
Want to be a Billionaire?
Quiz:
Quiz your knowledge
Wednesday, September 14, 2011
You Scream, I Scream, We all Scream for...
ICE-CREAM!
When making ice-cream in a baggie, a physical change takes place. No new substance is really formed. The ingredients are all still there! Use the link below to make your own ice-cream concoction. In class we used whole milk which turned out a little runny. Try Half & Hhalf and see if you observe any differences.
Ice-Cream in a Baggie
Video Tutorial
Subscribe to:
Comments (Atom)


